Almost exactly a year after publishing my MEL linear workflow tool, the Python version is ready. I am sad that 1 year later there is still a need for this tool (in Maya), but until Autodesk properly handles color management it makes life as a lighter much easier. With new Pre/Post-Render scripts it allows working in Maya in a WYSIWYG manner, hardware/viewports and color swatches provide reasonable previews without hindrance.

***update*** I’ve finally made this available for download:
Download wLinearWorkflow here Contains 1 directory (the python module) with readme, license, python code, and icons)
Section 1: Review Theory
Brief recap on Linear Workflow in Maya.
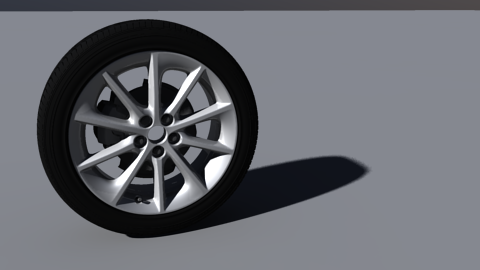
 Default Maya render (no display lookup/gamma and default nonlinear input colors). Even with open sky and Indirect Illumination, the effect is small. Highlights are burning.
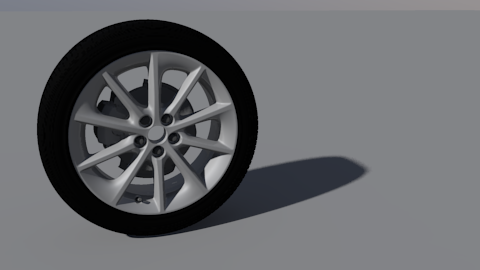
 Linear workflow render (sRGB display and linear shading/render). Fill and highlights are good. Yes, the image is very flat. This is because:
1 – the image is ungraded. Ungraded film and flat/neutral raw images have this washed out look. We’re so used to seeing auto color correction from cameras and graded footage that it’s easy to think something is wrong or worse. Now grading the CG to match footage becomes easy.
2 – this is a car tire with blinn shaders. It’s not pretty.
Section 2: Linear Workflow Tool
I redesigned the old MEL tool (started from scratch) to be more automatic and portable. Major features include:
- Pre/Post Render scripts are now reliable
- customizable profiles for display lookup (default is sRGB)
- customizable profiles for inverse lookup (default is gamma)
- customizable exclusions with a UI
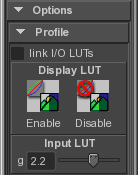
 Enable or Disable Pre-Render and Post-Render scripts. They will do all the work for you. Under normal circumstances this only needs to be done once, and it’s all you need to do. This creates a scriptnode in your scene
 Manual Shading Network Correction. This manually runs the Pre or Post Render scripts on the target network to linearize it. All color inputs (connections and solid colors) become linear, except for certain exclusions. Maya and MentalRay’s and built-in color management are only capable of correcting file textures, not solid colors or procedural textures. This tool linearizes everything appropriate so your result colors are what you expect.
 Targeted insertion/removal of correction nodes. This is for convenience and not normally needed. Works on selected nodes.
 Default profile uses Maya 2011+ viewColorManager nodes for proper rec709/sRGB display lookups. Input reverse lookups just use mip_gamma_gain because there’s no node for applying an inverse sRGB/rec709 profile to color and procedural textures. Profile can also be configured to use Maya’s (buggy) gammaCorrect node or almost any other node.
 Target used for manual shading network corrections. Can be selection, all, or auto (which uses all if none are selected, otherwise use selection). Using the Auto Pre/Post Render scripts always targets all (minus exclusions).
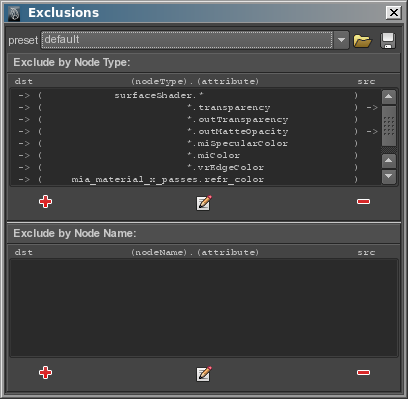
 Exclusions may be customized. Default exclusions exempt transparency and refractions, surfaceShader nodes, and (always) shader-shader connections. You can add/save/load exclusions for any node type, node name, or attribute.
 Exclusion UI. Displays exlcusions by Node Type (most common) and by Node Name separately to avoid confusion. Wildcards are supported to exclude any attribute named “transparency” from being linearized, or all attributes on a node such as “lambert1” or node type “surfaceShader”. Because certain names may be an input or output attribute, the connection type (source or destination connection) must be stated.
 This is the Exclusion UI pop-up window for adding or editing exclusions.